Everyone needs a bit of encouragement once in a while... With so many interesting creative techniques that I have yet to try, the development of my IT skills has never ranked highly. This was until an IT savvy friend downloaded Brushes XP to my iPad and challenged me to have a go.
I approached the activity with a degree of disinterest, but quickly found the app was pretty straightforward to use, even if I used undo and re do on a regular basis. My first images were quite simple line drawings, with the occasional use of colour. I used one layer, as you would if creating a traditional drawing on paper, then gradually explored different marks, the application of colour and adding more detail to my images. My subjects were predominantly portraits and figures, which I hadn’t completed for some years, so keeping the drawing and painting processes as simple as possible was important. My digital work was enhanced and developed as a result of being artist in residence at Scarthin Books in Cromford, Derbyshire. It’s a fabulous, quirky bookshop, with staff who are equally unique. With regular visits to the bookshop, I found that using my iPad was a really effective method of working and much less likely to cause damage to the fixtures and fittings than more traditional materials, such as charcoal or pen and ink. A number of these images can be seen on my website: www.lizwellby.co.uk. As my skill level and confidence grew, I began to explore the more complex aspects of the app and the potential for using layers. This allows adaptations to be made to an image, which, in the first instance can be temporary, so allows for lots of experimentation. My more complex digital paintings can feature up to 10 separate layers; imagine 10 separate paintings which are seen as a whole. Creating digital work has a number of distinct advantages over more traditional processes, which require space to work, time and potentially lots of pieces of equipment and materials. As long as I have my iPad, a stylus and somewhere to sit, I can work for 5 minutes or several hours; it’s a great process to pick up and set down. For the present I am focusing on the more traditional processes of drawing with pen and ink and creating collographs and woodcuts, but Brushes XP still has its uses. I can take a photograph of a piece of my work, export it into the app and quickly experiment with adding colour or try creating more detail, and all without making permanent changes to the print or drawing. Liz will be running an afternoon workshop from 2 - 5pm on Sunday 23rd June - An Introduction to Digital Drawing and Painting on iPads and iPhones.
1 Comment
WHEN A WET DAY PROVES THE CATALYST FOR DEVELOPING A NEW SET OF SKILLS...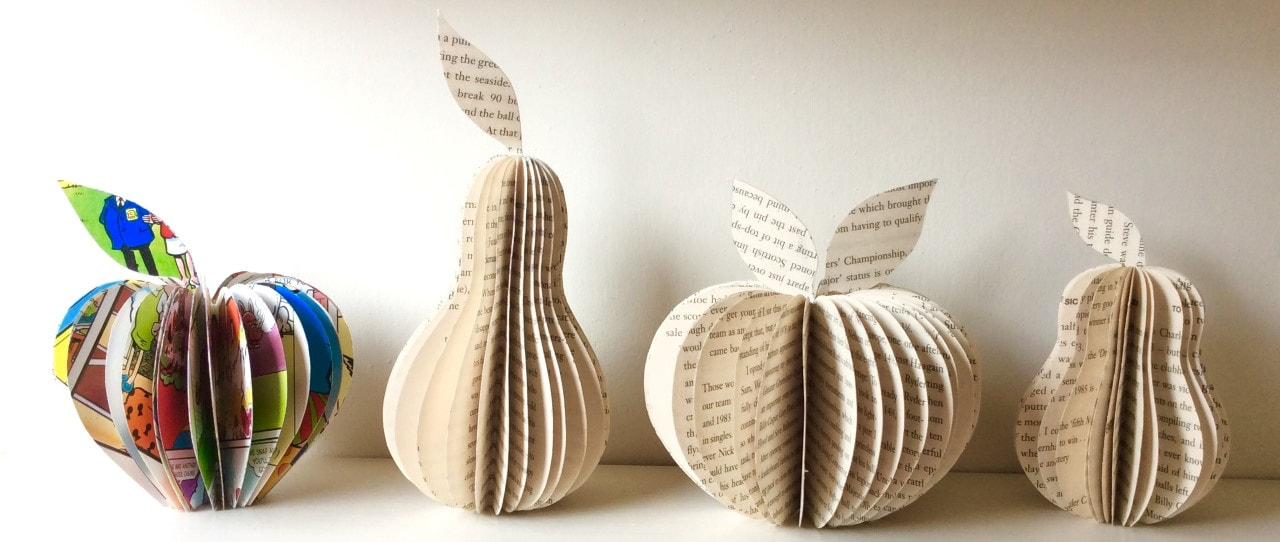 Being unwilling to venture out of the house, I was flicking though some old craft books and came across a rather complex process to make some lovely paper beads. With a pair of scissors, an old book and a Pritt Stick to hand, I set about simplifying the method and created my first outcome.
Using this deceptively simple process, which creates great results, I have created a range of paper sculptures from small hanging hearts a couple of centimetres high to free standing sculptures around 60cm tall, inspired by the collection of ceramics at Chatsworth House in Derbyshire; these pieces have been exhibited at Chatsworth as part of their annual Art Out Loud event, which attracts international artists to speak about their experiences and work. My favourite designs are those inspired by coffee and tea pots. I really enjoy creating a range of templates, making elegant spouts and handles, and choosing to make them from decorative papers from old books and children’s annuals. Teaching other people to make paper sculptures is immensely satisfying, whether they are the friends and family of a bride, coming together to make favours and decorations for a wedding venue or people joining me in my studio to create paper fruits to decorate their home in the Autumn months. Learning a creative technique is both challenging and stimulating, providing a significant boost to confidence, self esteem and positivity, and you get to take something fabulous away. Liz Wellby - Course Tutor (Paper Sculptures) If you were to ask people what batik was they would probably say it was a fabric technique using wax resist. The melted wax is either painted onto fabric or a tool called a tjanting is used to draw a line of wax onto the fabric. This then act as a resist once the fabric is dyed. I love batik and have always found the process fascinating, the unpredictability of the process, you never know what the outcome is going to be . 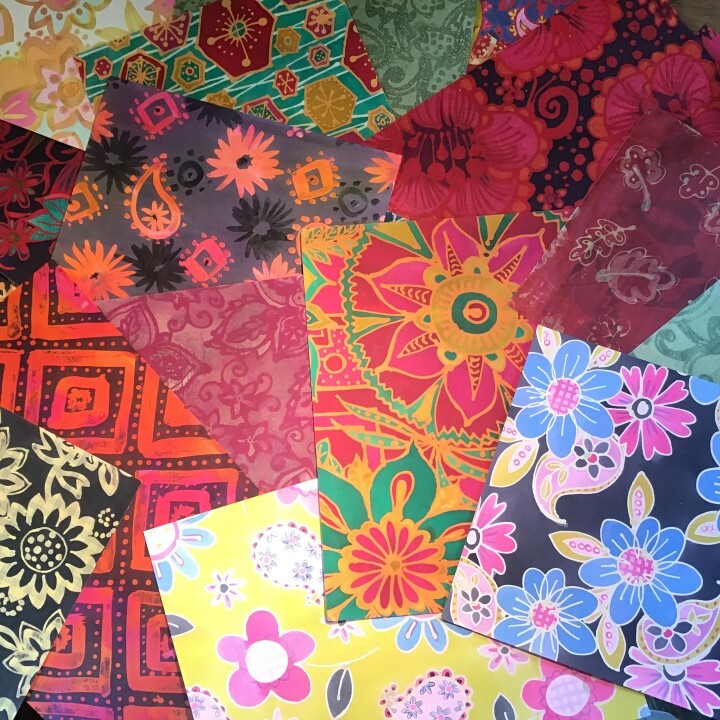 If you were to ask people what batik was they would probably say it was a fabric technique using wax resist.
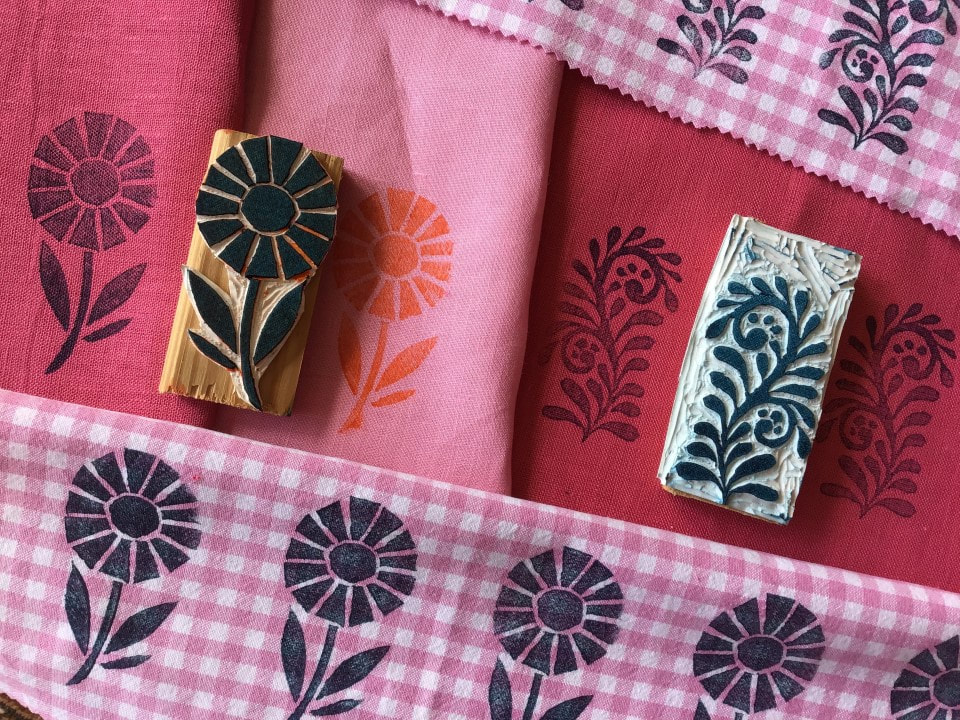
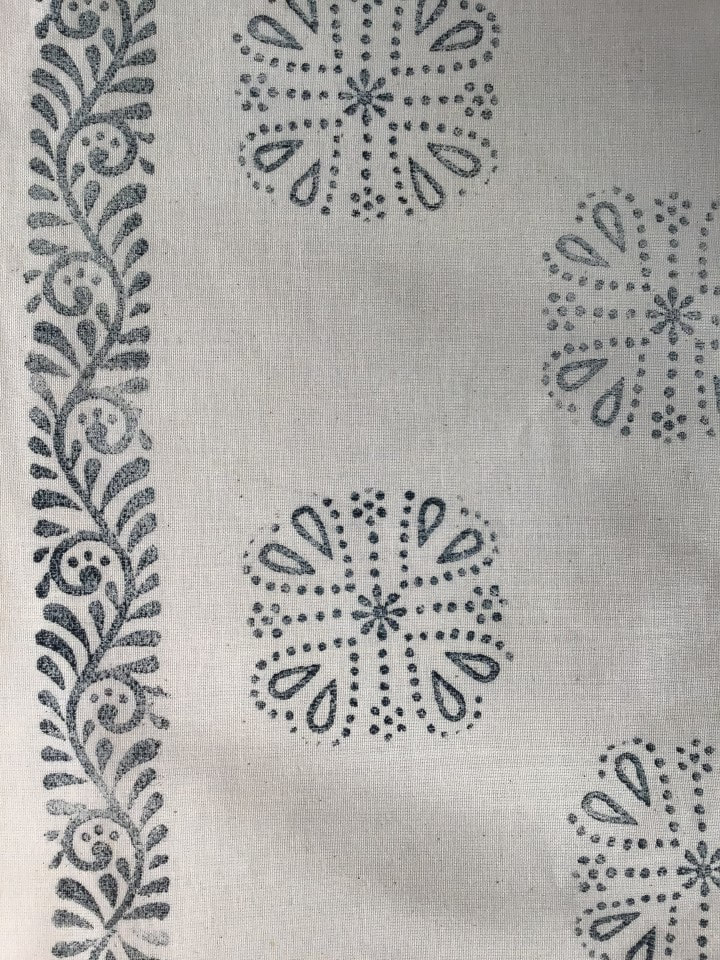
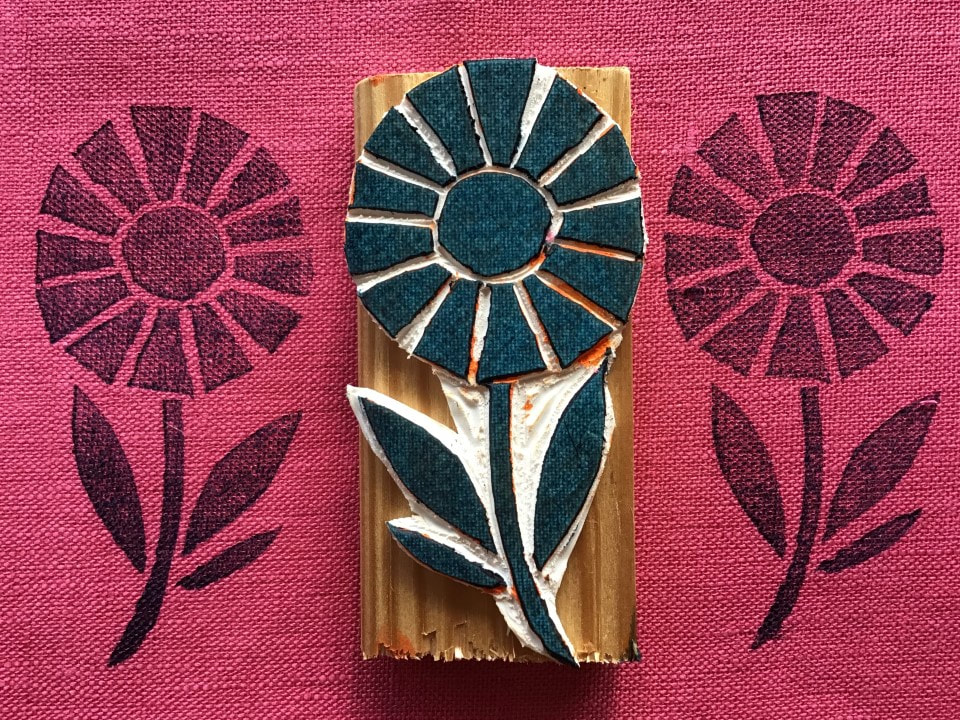
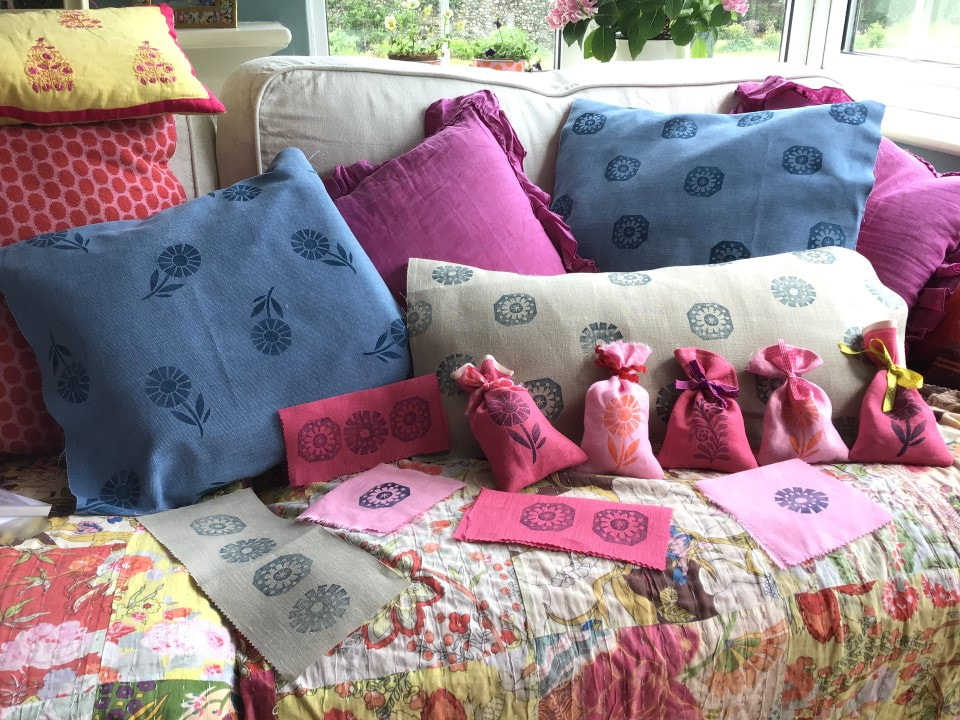
The melted wax is either painted onto fabric or a tool called a tjanting is used to draw a line of wax onto the fabric. This then act as a resist once the fabric is dyed. I love batik and have always found the process fascinating, the unpredictability of the process, you never know what the outcome is going to be . I first came across it while at college studying textiles. When I became a freelance designer, I used batik to produce some of my first commercial print designs . My designs were produced on paper rather than fabric resulting in bright vibrant designs that everyone loved, great for anything from swimwear to mens boxer shorts for M and S ! You can use any paper to work on: cartridge, watercolour, sugar paper, newsprint and handmade papers, all create a different look. Once the paper is stretched and dried you can either colour the paper with inks or apply the wax onto the paper as it is. I quite often colour my paper before applying the wax so that the wax line appears to be coloured. I then use bleach to remove the colour from the paper or you can simply use darker colours over the top. Once this is dry, you can start to colour in the image, a process which I have always found to be very absorbing and relaxing. Alternatively, you can keep adding more wax and more colour , there are no rules and it is fun to experiment, sometimes a happy accident can be your best work ! Once framed these pieces look amazing or alternatively you can cut them up to create unique greetings cards. Learn how to do this at Art in The Barn on Monday 24th June on the Beautiful Batiks Workshop There is something immensely satisfying about creating a product that you can use in your own home. When I couldn’t find cushions that I really liked, I decided to make my own. Inspiration came from a number of old wooden printing blocks I bought whilst on holiday in India. I began by printing the blocks onto paper using water based printing inks. Unfortunately, they had clearly been knocked around which spoilt the outcomes. I sketched out a few ideas based on the prints and transferred them to some off cuts of my printing material. There are a number of brands available, but I prefer Essdee Mastercut as it’s easy to cut, creates a nice sharp image when printed and is inexpensive. I carefully cut to the outline using lino cutters and then cut away the negative space or background.
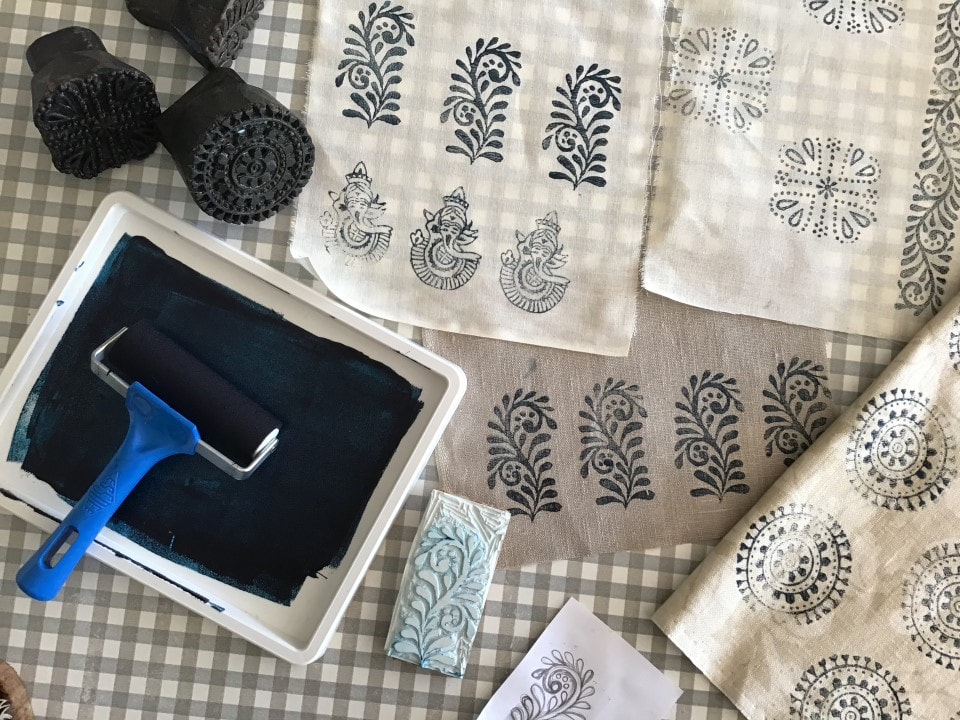
I then tested my stamps by printing onto paper with some ink pads and water based inks to check that I was happy with the design. A little bit of re cutting removed small sections which spoilt the design. I then prepared myself for printing onto fabric. I cut small sample pieces from a few pieces of heavy weight cotton and linens and experimented with my chosen coloured inks. "Speedball" have an excellent range of screen printing inks, which adhere well to the surface and can be ironed to make them colour fast. Some colour combinations were more successful, but the samples wouldn’t go to waste as I knew I could make Lavender bags with them. It can feel a bit intimidating having a large piece of fabric to work on, so I prefer to cut pieces to size. It can also help to print on paper first to experiment with layout and find the right pressure and quantities of ink to use. Have baby wipes to hand and try and keep everything really clean to avoid blobs of ink where you don’t want them. Fabric needs to be left to dry and then ironed following the manufactures instructions. A few hours of work, has enabled me to make products that I really like and an appreciation of how beautiful my Indian printing blocks are. You can see some pictures of this on our blog and learn how to do this at Art in The Barn on Friday 21st June on the Create Printed Fabric Products Workshop.
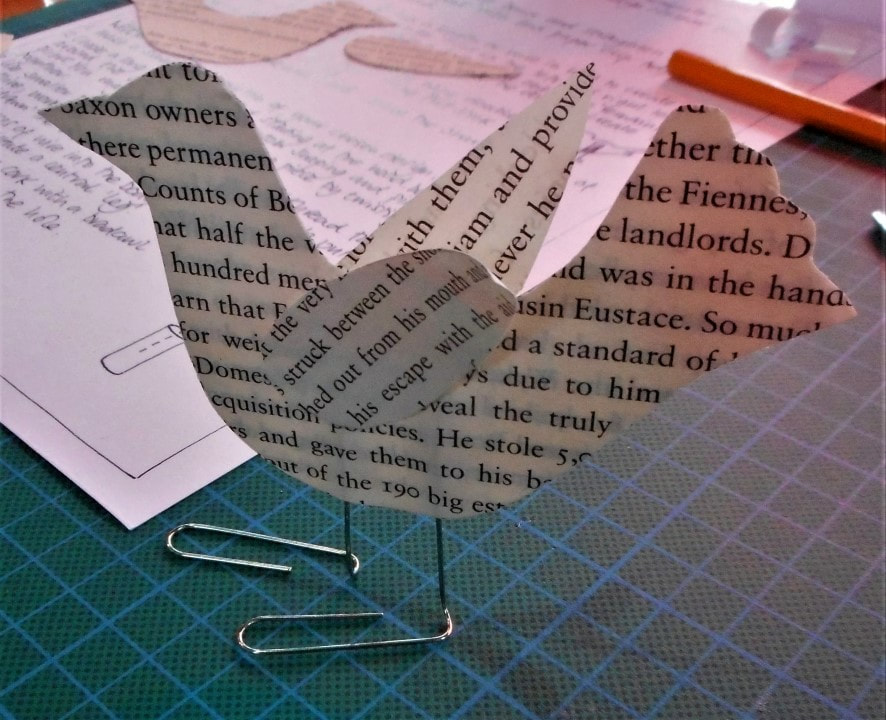
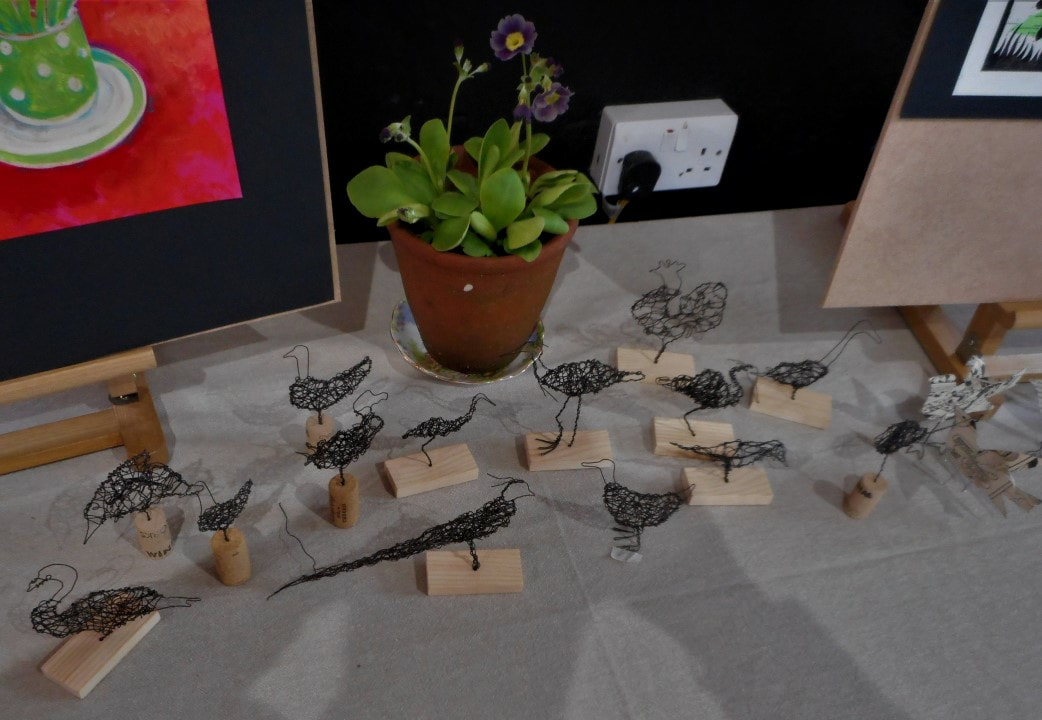
Back in March we delivered a really enjoyable day creating Wire Sculptures. The day was led by Liz Wellby, an experienced artist and maker from the Peak District. Liz has been teaching and creating artwork for over 25 years having completed a Fine Art degree in Sculpture at Loughborough University in 1990. She creates a range of work in different media including printworks, digital drawings and paintings. More recently, Liz has been producing a range of bird and animal sculptures; they may be small enough to hold in your hand, but this doesn't stop her capturing their personality and animation. The principles of making the sculptures were explained and demonstrated, with the necessary skills gradually developed. By the end of the morning, as well as having learnt a range of new skills, everyone had produced their own small scale wire sculptures of different types, including: kingfishers, chickens, geese, swans, pheasants and various types of garden bird. The group worked very well and produced some excellent outcomes. Getting started Unlike with some creative processes the equipment needed is minimal and low cost, with nothing that a trip to Robert Dyas won't solve, if your tool box doesn't contain a small pair of pliers and wire cutters. A fine, flexible wire is necessary to suit the scale of the birds. A scale drawing of your chosen bird provides a helpful template to start working from. If this is something that you find difficult to achieve, it is possible to use a small photograph. It is important that your bird has a strong profile showing the head, body and wings. The Making Starting with the beak, a long piece of wire is carefully shaped to the outer edge of the drawing, using a combination of fingers and the pliers; the ends are then carefully twisted to secure the shape. This is quite fragile, so it's best to avoid distorting the shape. Working from the top of the body, twist a smaller length of wire to the outline and cross the body; repeat this process weaving lengths of wire across the basic shape and securing these by twisting onto the outline wire shape. Further weaving and interweaving will fill the space and ensure that the main body becomes rigid as you do so. This sculptural process is clean and direct, and you can realise a creative outcome in a relatively short period of time. You can create interesting and often dynamic three dimensional outcomes that have their own personalities. So why not join us on one of our workshops , the next one being on Thursday 20th June this year - see http://www.bloomingdesigns.com/wire-sculptures.html |
AuthorAlison Butler, Artist, Designer and Course Instructor Archives
March 2023
Categories |


 RSS Feed